Project Features
- Simple
- Cheap
- Doesn't take long
- Can be done by children (with a little help)
Introduction
When I was working on one of my projects recently, my 8-year-old son came along and wanted to "help me". I was working on something really complicated and there was no way I would let him meddle with it.
On the other hand I wanted to take the opportunity to show him that electronics can be fun. So I decided to build a small 9-Volt torch light with him.
Components
There are only three components which are widely available.
There is a white LED. This is a standard round white high brightness 5mm LED, rated at 20 mA. Next there is a current limiting resistor, 220 Ohms. And finally there is a battery clip. I salvaged that from a discharged 9-Volt block battery.
Step-by-Step
We started with the LED. Note that it has a longer and a shorter lead. The shorter lead is the cathode and has to be connected to the "-" terminal of the battery.
For our purpose, the leads were to long so we shortened them - preserving the difference in length.
Next, the resistor had to be attached. We began by wrapping one of the resistor leads around the longer lead (the anode) of the LED.
Now for some soldering. Not a bad job, I think.
The soldered leads were clipped.
Almost done. The last step was to connect the circuit to the battery. This has to be done the right way round. So take a look at the side of the battery. This tells you what is the "-" and what is the "+" terminal. Note that on the clip that gets stuck on, it is just the other way round.
We were able to use the contact strips remaining from the discharged battery. The remaining LED lead connects to the round terminal on the clip. The resistor terminal connects to the hexagonal terminal.
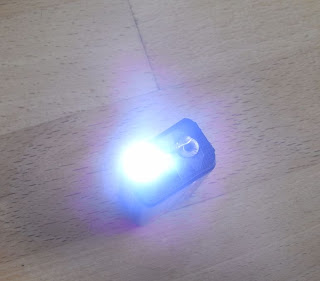
That is it! Check that there is no short circuit anywhere and connect the battery. You should have light.
The Math
Some simplified math for the bigger kids:
The battery delivers 9 Volts. The LED should be operated at 20mA and a resulting voltage of about 3.5 Volts. The resistor is there to adapt both to each other. The voltage over the resistor should therfor be 9 - 3.5 = 5.5 Volts. The current through the resistor should be 20 mA.
Now we can apply Ohm's law to calculate the resistor:
R = U / I
In our case R = 5.5 Volts / 0.020 A = 275 Ohms. Since that exact value is not available, we used a commonly available 220 Ohm value.
In theory this results in a current of (Ohm's law again, but reversed):
I = U / R, here I = 5.5 Volts / 220 Ohms = 25 mA.
On our lamp we measured 24 mA. Note that although the LED is rated at 20 mA, it will not be destroyed at currents up to 30 mA. Much higher currents will shorten the LEDs life time though.
Also, the battery voltage will go down when discharging, so the current goes down anyway.
How long will the light last on a fully charged battery? Well, for a rechargeable 9-Volts battery that I have, the capacity is given with 180mAh. So the operation time would be 180 mAh / 25 mA, about 7 hours. Since current (an brightness) will go down over that time, it will actually last longer.
Final Thoughts
To make the torch light a bit more robust, it could be covered e.g. in hot glue. This would protect it from breaking as well as from short circuits over the battery terminals.


Nice! You did what you have to do while teaching your son that electronics is fun! Good job!
ReplyDeletea nice project
ReplyDeleteNice, but with 2 LED in series he'd get more light for the same battery usage.
ReplyDeleteVery nicely written.
Deleteits nice
ReplyDeleteWell done. I am teaching my grandson at the moment and all simple projects are just what I and he are looking for.
ReplyDelete